Categories
Categories
- Home
- Cake Decorating Tutorials-Recipes - Free
- Cake Decorating Instruction (2)
Cake Decorating Instruction (2)
Cake Decorating Instruction
Free Tutorials on cake decorating and how to use your cake decorating supplies.
Cake & Icing Preparation
- Baking the Cake
- Baking Times, Batter Amounts & Number of Servings
Icing Chart - What Type To Use, Storage, Etc.
Leveling the Cake
Cake Board Preparation - Cake Board Ruffle Chart
Torting the Cake
Filling the Layers - Stacking the Layers
Achieving A Smoothly Frosted Cake
Two Methods of Icing the Cake
Cutting Charts - ------------------------------------------------
-
Cake Board Preparation
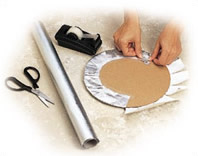
For round, square and sheet cakes, you don't need to cut the cake board. Just use a board that is 2 inches larger than your cake. (If the cake is 8 in. diameter, buy a 10 in. round board.) For shaped cakes, you will need to cut a board to fit: Turn pan upside down and trace onto your cake board, leaving 1 in. extra around the edges. Cut board with a craft knife. Next, trace the cut board onto Floral Foil, making outlines 3-4 inches larger than the board.
Now, wrap the board: Cut Floral Foil along outline. Place your board, white side down, on top of your cut foil. Cut deep slits at several points along foil edge, creating tabs of foil to wrap neatly around the board. Secure foil tabs to the board with tape.
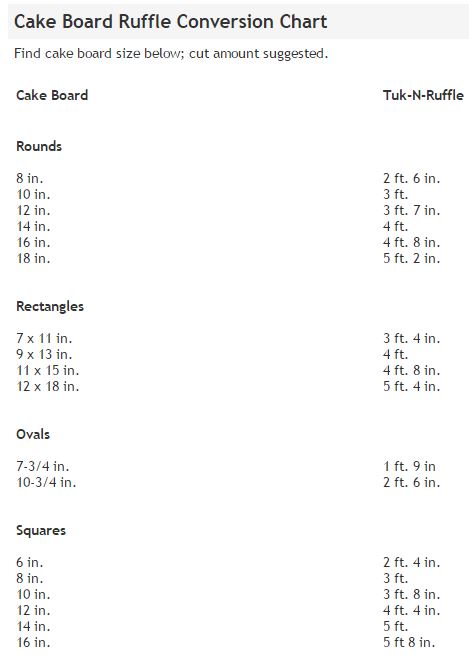
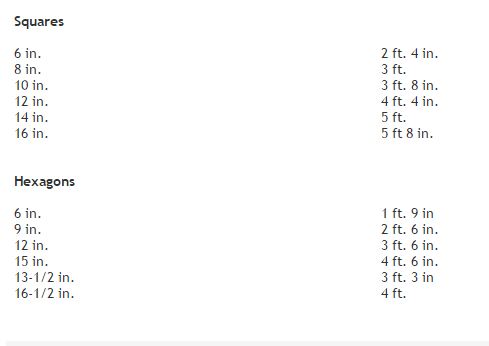
Adding Ruffle to your cake board? Use the chart below for correct measurements.
------------------------------------------------------------------
------------------------------------------------------------------
Torting
Add height to your tiers and flavor to your cakes by torting and filling each cake. Buttercream or thick-consistency fruit fillings work great; don't use any filling which may spoil or runny fruit fillings which may seep into the cake and discolor it.You may torte a tier to create several divisions.
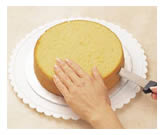
1. USING A SERRATED KNIFE
Measure cake sides and mark with dots of icing or toothpicks all around. Place one hand on top of the cake to hold it steady and rotate the stand. While slowly turning the cake, move the knife back and forth to cut cake along the measured marks. Repeat for each additional layer.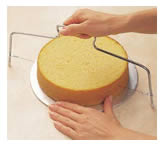
2. USING THE WILTON CAKE LEVELER
Torting is easily done with the Cake Leveler. Follow the same procedure you use for leveling.------------------------------------------------------------------
Filling the Layers
Fill a decorating bag with medium consistency icing and use a large round tip. Or, simply use the coupler without mounting a tip.
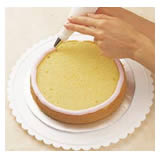
1. Starting with the bottom layer, leveled or torted side up, create a dam or circle of icing just inside the edge of the cake. Creating a dam will prevent filling from seeping out when other layers are placed on top. To create the dam, squeeze a circle about 3/4 in. high and 1/4 in. from the outside edge.
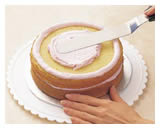
2. Fill the dam with your choice of filling.
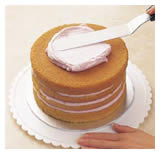
3. Place the next layer on top, making sure it is level. The weight of the layer will cause the circle of icing to expand just right. Repeat until all layers, except the top, are assembled. Place the top layer, leveled side down, so the top of the cake is perfectly smooth and level.
------------------------------------------------------------------
Stacking the Cake
For a classic round or rectangular cake, you may want to put two leveled cakes together, joined with your favorite filling. This adds height and drama to your design. It's easy to do!

1. Fill a decorating bag with medium consistency icing and use tip 12 or use the coupler without adding a tip. Start with the bottom layer, leveled side up. Create a dam or circle of icing just inside the edge of the cake. This will prevent any filling from seeping out when the next layer is added. Squeeze a circle about 3/4 in. high and 1/4 in. from the outside edge of the cake.

2. Fill the center with icing, fruit filling or pudding.
3. Place the next layer on top, making sure it is level. The weight of the layer will cause the circle of icing to expand just right. Place the top layer, leveled side down, so the top of the cake is perfectly smooth and level.
Achieving A Smooth Buttercream-Frosted Cake
Creamy Smooth Icing & Spatula or Icer Tip Method (See Instructions Below for applying icing)
The easiest way to achieve a smoothly frosted cake is to begin with a creamy smooth icing. To achieve creamy smooth icing with a planetary-action mixer (KitchenAid and Hobart), completely fill the bowl and cover the top of the paddle with icing. Mix on low speed until all air bubbles are broken down. Do not overmix. If your mixer has standard beaters, mix with the icing coming only half way up the beaters. If a cake is frosted with creamy smooth icing, a smoothly frosted cake can usually be achieved by using only a large, angled spatula held at a slight angle so just one side of the spatula skims the surface of the icing. Smooth the sides first then the top. On the top, work from the outside edge towards the center. Use long, smooth strokes that feather off just past the center. Clear the spatula after each stroke.
Paper Towel Method
Certain brands of paper towels can be used to obtain a smooth icing surface. To begin, spatula smooth the icing as described above. Let the icing crust approximately 15 minutes. Test a small area by rubbing your fingers over a dry paper towel on the icing. If it does not stick, you may lay the paper towel over the icing (flat) and rub over it with your fingers and palm, keeping your hand as flat as possible. This removes air bubbles and spatula marks creating a smooth surface.
Water Smoothing Method
This method can be done one of two ways.
1) Frost the cake as usual and presmooth with a dry spatula. Dip a large spatula in hot water. Hold the spatula at a slight angle so just one side skims the surface of the icing. Smooth the sides of the cake first. Smooth the top of the cake from the outside edge of the cake towards the center. Use long, smooth strokes that feather off just past the center. Clear and rewet the spatula after each stroke. Be careful not to overwet the icing. Colored icing may streak.
2) Or use a spray bottle to slightly wet the icing then skim the spatula across the surface as described previously. Clear the spatula after each stroke. Be careful not to overwet the icing. Colored icing may streak.
Icing the Cake
When you ice a tier cake, remember-crumbs are your enemy. They'll ruin the perfectly clean look you strive for. The trick to keeping crumbs out of your icing is to glide your spatula on the icing. Never allow the spatula to touch the surface of the cake. Some decorators prefer to "crumb coat" layers by lightly icing the cake first, allowing a light crust to form, then adding a top icing cover.
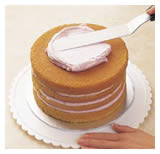
1. Place a large amount of thin consistency icing on the center of the cake top. Spread across the top, pushing toward edges.
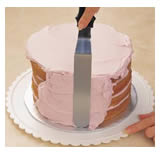
2. Cover the sides with icing. Smooth sides first by holding the spatula upright with the edge against the side, slowly spinning your decorating turntable without lifting the spatula from the cake's surface. Return excess icing to the bowl and repeat until sides are smooth.
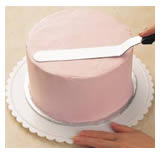
3. Smooth the top using the edge of the spatula. Sweep the edge of the spatula from the rim of the cake to its center. Then lift it off and remove excess icing. Rotate the cake slightly and repeat the procedure, starting from a new point on the rim until you have covered the entire top surface.
Smooth the center of the cake by leveling the icing with the edge of your spatula. For easier smoothing, it may help to dip the spatula in hot water, wipe dry, and glide it across the entire surface. Set the cake aside and allow the icing to crust over for at least 15 minutes before decorating. At this point you may also lay parchment paper on the iced cake top and gently smooth with the palm of your hand.
USING A #789 Icer Tip
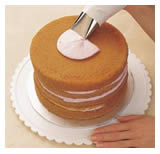
1. Trim a 16 in. Featherweight bag to fit tip 789. Fill bag half full with icing. Hold bag at 45º angle and lightly press tip against cake. Squeeze a ribbon of icing in a continuous spiral motion to cover cake top, with last ribbon forcing icing over edge of cake top.
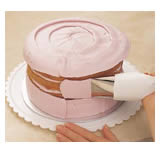
2. To ice the sides, squeeze icing as you turn the cake slowly. Repeat the process until the entire cake side is covered.
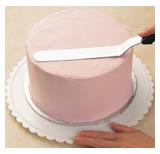
3. Smooth the sides and top with a spatula, same as above.
Portions of text and images courtesy of Wilton Industries, Inc. Used with permission.
![]()
 Loading... Please wait...