Categories
Categories
- Home
- Cake Decorating Tutorials-Recipes - Free
- Cake Decorating Instruction - Misc.
Cake Decorating Instruction - Misc.
Subscribe to Our YouTube Channel To Be Notified When New Videos are Released
Cake Decorating Instruction
Free Tutorials on cake decorating and how to use your cake decorating supplies.
Storing Your Cake
Take some final precautions and store your cake the best way possible. After all, your time, effort and creativity have made it very special!
Beware of the following factors, which can affect the look of your decorated cake:
Sunlight and florescent lighting will alter icing colors. Keep your cake stored in a covered box and out of direct sunlight and florescent lighting.
Humidity can soften royal icing and gum paste decorations. If you live in a climate with high humidity, prepare your royal icing using only pure cane confectioners' sugar (not beet sugar or dextrose), add less liquid and add 1 more teaspoon Meringue Powder to the recipe.
Heat â€" can melt icing and cause decorations to droop. Keep your decorated cake as cool as possible and stabilize buttercream icing by adding 2 teaspoons Meringue Powder per recipe. Protect your cake by placing it in a clean, covered cake box. Avoid using foil or plastic wrap to cover a decorated cake â€" these materials can stick to icing and crush delicate decorations. The icing that covers your cake determines how it should be stored â€" in the refrigerator, at cool room temperature, or frozen, if storing for longer than 3 days. If you want to store your iced cake in a different way than noted, make a small test cake.
Icing - See Icing Chart for storage information for the type of icing used.
Note: Cakes with thoroughly-dried royal icing decorations should be stored according to the type of icing they are covered with. However, if royal icing decorations are to be put on a cake that will be frozen, it is recommended that icing decorations be placed on the cakes after thawing, so that colored decorations won't bleed from condensation or become soft.
Transporting Cakes
Moving a tiered cake from one location to another does not have to be difficult. Following some simple guidelines ensures that your cake will arrive safely—whether you are traveling hundreds of miles or just a few.
Be certain the cake is constructed on a sturdy base made of three or more thicknesses of corrugated cardboard. Base tiers of very heavy cakes should be placed on a fiberboard or plywood base, about ½ in. thick.
Cakes on pillars must be transported unassembled. Toppers, candles and ornaments should be removed from cakes when they are being moved.
For stacked cakes, move the entire assembled cake. Or, for a larger quantity of tiers, transport unassembled and assemble at the reception. Be sure to have with you the equipment and icings you will need to finish any decorating needed after assembly at the final destination.
For a combination cake (pillar and stacked), take tiers apart, keeping stacked tiers as units. Boxing the cake makes transportation easier. Not only does it protect the tiers from damage, but it keeps the tiers clean-free from dirt, dust and bugs. Place the boxes on carpet foam or a non-skid mat on a level surface in the vehicle to prevent shifting. Keep the boxes flat; never place on a slanted car seat. Boxed cakes can also be transported in the trunk of the car in cool weather (air conditioning will not reach the trunk area). It´s also important to find our about the reception location before the event. Knowing what to expect when you arrive can make your delivery and setup so much easier. Call the reception hall a few days before the event to get an idea of the conditions you will encounter there. Ask whether the room is located upstairs or downstairs. Find out what is the best location for bringing the cake into the building. That way you can park in the right place the first time and minimize tthe distance your cake has to travel from your car. Also ask how far in advance the cake can be set up so that you can plan your day and reduce the stress.
At Your Destination
Before you bring in the cake from your car, walk the path you will have to travel to the set-up site. Be alert for any bumps along the way and note any tight spaces you will have to maneuver around. Make sure the cake table is level â€" it´s a good idea to bring a level to the check this on setup day. Request a cart on wheels to move the cake into the reception area. This is easier and safer than carrying by hand. Remove the cakes from the boxes on the reception table by cutting the sides of the boxes and sliding the cakes out. Bring along a repair kit, including extra icing, prepared decorating bags and tips, flowers and spatulas, just in case it is necessary to make any repairs. Once the cake is assembles, take a picture to establish that the cake was in perfect condition when you left it.

In Pan
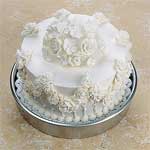
Take tiers apart if constructed by Center Column or Push-In Leg method. Position the plates on crumpled foil or in shallow pans if they do not sit level. Remove pillars from tier plates; plates stay in position.

In Box
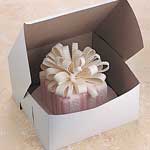
Place the cakes in clean, covered, sturdy boxes that are sized to the base board of each cake. This will prevent the cake from shifting within the box and possibly crushing the sides of the cake. If the box is too big, roll pieces of masking tape sticky side out and attach to the inside bottom of the box. Position the cake base on top of the tape. The tape will hold the base in place within the box. For boxes which must hold taller decorations, prop up top and sides and secure with masking tape.

On Foam
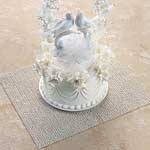
If tiers cannot be boxed, they can be transported on large pieces of non-skid foam. Place the foam on the floor of the vehicle, then carefully place the tiers centered on each piece of foam.
Pan Coat Recipe
1 c. solid vegetable shortening (like Crisco)
1 c. all-purpose flour
1 c. vegetable oil
Mix ingredients together on medium speed until well blended.
Store in refrigerator to maintain consistency.
Use a pastry brush to generously coat inside of cake pans.
Lasts several weeks in refrigerator.
Portions of text and images courtesy of Wilton Industries, Inc. Used with permission.
![]()
 Loading... Please wait...