Categories
Categories
- Home
- Cake Decorating Tutorials-Recipes - Free
- Cake Decorating Instruction - Tiered Cakes
Cake Decorating Instruction - Tiered Cakes
Cake Decorating Instruction
Free Tutorials on cake decorating and how to use your cake decorating supplies.
Building a Tiered Cake (See our YouTube Video on Stacking a Tiered/Wedding Cake)
We do not recommend using dowel rods in a wedding cake (except for tiers stacked one on top of another). We have listed the several methods of stacking cakes below that are less likely to cause problems for the cake decorator.
There are no shortcuts when it comes to building a tiered cake. Remember, the same principles an architect follows when creating a skyscraper should be followed on your cake. The proper supports, such as cake circles/boards and separator plates, must be used in the right places in order to prevent the whole structure from toppling over.
In this section we´ll show you construction methods that apply to most tiered cakes. Don´t let the prospect of building a towering group of tiers intimidate you. If you do a dry run of the structure, and follow the construction steps faithfully, you will feel confident that your cake will stand securely on the wedding day. Adding fountains and stairways to your cake is also no problem—see our step-by-step instructions for the best ways to install and decorate them.
You can find out more by selecting one of the construction methods listed below:
More Cake Construction Ideas:
Cake Stand Construction
Push-In Pillar Construction
Center Column Construction
Fountain Set-up with Pillars
Stairways & Bridges
-----------------------------------------------------------
Cake Stand Construction
The easiest and safest of all construction methods, because cakes are positioned on plates which fit right into the stand. Each cake stand requires specific cake sizes to fit its design. Many stands come with the plates sized to fit; cake tiers should be 2 in. less in diameter than the plates.
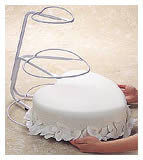
1. Decorate individual cake tiers on separator plates, which fit the stand.
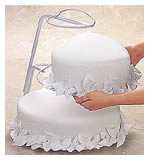
2. Position cakes in stand, placing the feet of the separator plate securely inside the bars of cake stand, so that the plate surface rests on the bars.
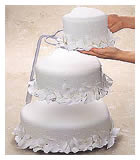
3. Display the assembled cake on a secure table.
-----------------------------------------------------------
Push-In Pillar Construction
Simple assembly—no dowel rods needed! Use any type of Wilton Push-In Pillars and Plates.

1. Mark tier for push-in pillar placement. Use the separator plate for the next tier above, gently pressing it onto the tier, feet down, making sure it is centered. Lift plate away. The feet will leave marks on the icing to guide the position of pillars when you assemble the tier. Repeat this process for each tier, working from largest to smallest tier. The top tier is left unmarked.
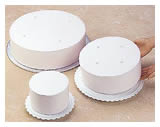
2. Place each tier on its separator plate, securing with icing.
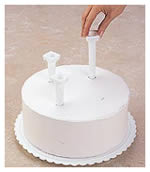
3. Position push-in pillars at marks, and insert into tiers. Push straight down until pillars touch the cake board.
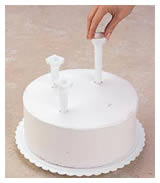
4. To assemble, start with the tier above the base tier. Place the feet of the separator plate on the pillar openings.
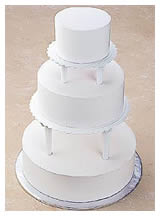
5. Continue adding tiers in the same way until the cake is completely assembled
-------------------------------------------------------------------------------
Center Column Construction
Another very easy way to construct a tier cake - The Center Column Cake Stand.
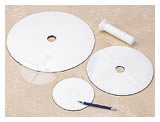
1. Use boards the same size as tiers, or if tiers are shaped, cut boards to fit. Make a waxed paper pattern for each tier except the top tier in order to find the exact center for the columns. Fold the waxed paper pattern in quarters. Snip the point to make a center hole. Test the hole for size by slipping it over a column, adjust size if necessary. Trace hole pattern on prepared cake board and cut out. Also cut a hole in the top tier board to allow for the column cap nut. Save patterns for marking cake tops later.
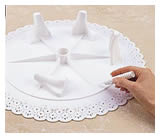
2. The base tier of the cake will rest on a 14, 16 or 18 in. plate, all of which are included in the Wilton Basic Tall Tier Cake Stand Set. The 18-in. plate is footed; you will need to attach glue-on plate legs (not included) to the 14 or 16-in. plates. To attach legs, turn plate upside down. Using extra-strength glue designed for plastic, attach the six legs, positioning the legs over each of the ribs on the plate.
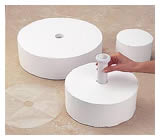
3. Prepare and ice tiers and position on prepared cake boards. Make the center holes in two lower tiers for the columns. Mark the top of the cakes with the corresponding waxed paper pattern. Cut the hole by pressing the Cake Corer through the tier right down to the bottom. Hold the corer upright, remove cake corer and push the upper part down to eject the cake center.
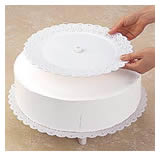
4. Attach a 7 3/4-in. column to the prepared base plate with the bottom column bolt from underneath the plate. Slip the bottom tier over the column to rest on the plate. Set a plate that is one size smaller than plate below on top of the column.
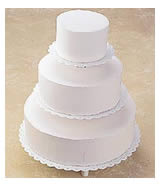
5. Add a second 7 3/4-in. column and position the next tier on the plate, slipping it over the column. Finally, add a plate one size smaller than the previous plate, securing with top column nut. Place the top tier on the plate. Mark the backs of all tiers with a dot of icing as a guide when setting up at the reception.
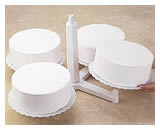
6. To create "Lady Windermere" look, simply replace the footed base plate and its 7 3/4-in. column with a Wilton Four Arm Base and the 13 1/2-in. column. Insert the four spacers into the openings on the underside of the base at the end of the arms. These spacers will keep the base level once the column and the base bolt are added. Glue the spacers in place. Position four identical base cakes on 10 or 12 in. plates, then add desired tiers upward (up to 3 graduated sizes can be added to the center columns).
---------------------------------------------------------------------
Fountain Set-Up with Pillars
The brilliance of gently illuminated falling water turns a wedding cake into a spectacular display. A Cake Fountain easily complements different cake designs in any number of ways--simple planning and careful preparation make this possible! Assemble the fountain following package directions. It is a good idea to test the fountain before the reception to be certain the water is flowing properly. Be sure the display planned for the fountain will accommodate the height and width of the fountain. Measuring and assembling plates and pillars with the fountain ahead of time will prevent any unpleasant surprises at the reception if the fountain does not fit.
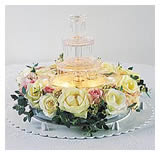
1. Position Fountain on plate
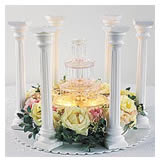
2. Assemble pillars and additional base plate. Use 14 in. or larger plates; 13 in. or taller pillars for the tallest cascade.
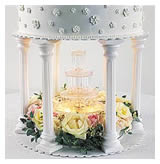
3. Assemble cakes.
------------------------------------------------------------------------------------
Stairways With and Without Bridge
Stairways (Use 2) Without Bridge
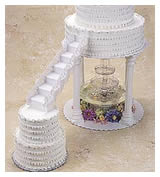
1. Arrange main cake and any satellite cakes in approximate positions. Have someone hold stairway above cake and shift cakes as necessary. Gently insert top of stairway into top side of main cake until stairway is flush with side of cake. Allow bottom of stairway to rest on top of connecting cake.
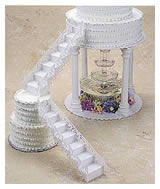
2. Continue adding stairways according to design instructions.
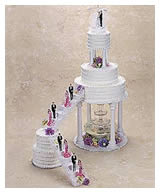
3. Add figurines (be certain to dowel rod area on cakes where stairways will rest when positioning figurines, flowers or ornaments).
Stairways with Bridge (Use 4 Stairways, 1 Bridge)
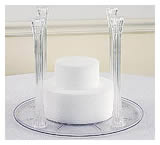
1. Arrange main cake and any satellite cakes in approximate positions. Have someone hold stairway above cake and shift cakes as necessary. Gently insert top of stairway into top side of main cake until stairway is flush with side of cake. Allow bottom of stairway to rest on top of connecting cake.
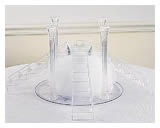
2. Continue adding stairways according to design instructions.
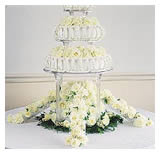
3. Add figurines (be certain to dowel rod area on cakes where stairways will rest when positioning figurines, flowers or ornaments).
Portions of text and images courtesy of Wilton Industries, Inc. Used with permission.
![]()
 Loading... Please wait...